Installing Kubuntu Feisty 7.04 on Asus F3Tc-AP049
General hardware specifications of the laptop
Asus specifications
| Components |
Type |
Status under Linux (x86) |
Notes |
| Processor |
AMD Turion64 X2 TL56 1.8 GHz |
Works out of the box |
See frequency scaling and thermal control |
| Chipset |
nVidia C51MV(C61) + MCP51 |
Works out of the box |
- |
| RAM |
2x1024 MB DDRII 667MHz (expanded from 1x1024) |
Works out of the box |
- |
| Display |
15.4" TFT WXGA Color Shine, 1280 x 800 @ 60 Hz |
Works |
See vga configuration (how to set correct resolution) |
| VGA |
nVidia GeForce Go 7300, 128 MB DDRII |
Works |
nVidia proprietary drivers, see vga configuration for more info |
| Sound |
Intel High Definition audio compliant audio chip |
Works |
Tested: integrated speakers, head phones and microphone |
| HDD |
Hitachi HTS541612J9SA00 120GB 8MB 5400rpm SATA |
Works out of the box |
Dual-boot (WinXP) is working, see pre-installation for partitioning details |
| DVD-RW |
HL-DT-ST DVD-RAM GSA-T20N |
Works out of the box |
Tested: CD-R/DVD-RW reading, DVD-RW writing |
| LAN |
nVidia 10/100/1000 Ethernet |
Works out of the box |
Tested: 100Mbit communication |
| WLAN |
Atheros AR5006EG 802.11b/g |
Works out of the box |
Tested: managed mode |
| Bluetooth |
v2.0+EDR |
Works out of the box |
Tested: connection to my mobile phone |
| USB |
4 x USB 2.0 |
Works out of the box |
Tested: mouse, flash disk, external drive, printer |
| Card Reader |
Ricoh R5C822 SD/SDIO/MMC/MS/MSPro |
Works out of the box |
Tested: SD card (256MB) - mounted automatically and worked |
| Touchpad |
Alps |
Works out of the box |
See touchpad for configuration info |
| External Monitor |
VGA + DVI + TV-out |
Works |
nVidia proprietary drivers, tested: TwinView with external LCD panel (DVI) |
| Webcam |
Syntek Semiconductor, 1.3M |
Microphone is not working |
syntek driver, see webcam for putting into service info |
| FireWire |
IEEE 1394 compliant |
Untested |
I don't have any firewire device to test |
| Expresscard |
|
Untested |
I don't have any express card to test |
| Modem |
Motorola SM56, 56 Kbps |
Untested |
I think I won't ever need it, so I don't care |
Function keys
| Fn+F1 |
Suspend switch |
Works |
| Fn+F2 |
Wireless (bluetooth) switch |
Works |
| Fn+F3 |
E-mail |
Works |
| Fn+F4 |
Internet |
Works |
| Fn+F5 |
Brightness down |
Works |
| Fn+F6 |
Brightness up |
Not even detected by xev * |
| Fn+F7 |
LCD on/off |
Works |
| Fn+F8 |
LCD/CRT switch display |
Not even detected by xev |
| Fn+F9 |
Touchpad lock |
Works |
| Fn+F10 |
Volume on/mute |
Works |
| Fn+F11 |
Volume down |
Works |
| Fn+F12 |
Volume up |
Works |
|
|
|
| Fn+UpArrow |
Stop |
Works (amarok) |
| Fn+DownArrow |
Play/Pause |
Works (amarok) |
| Fn+LeftArrow |
Previous song |
Works (amarok) |
| Fn+RightArrow |
Next song |
Works (amarok) |
* This notebook has probably a broken DSDT table, as result Fn+F6 button does not work at all.
See this article for more details.
Special keys
These keys are on the upper-right side above the keyboard. I don't know how
to describe their meaning (I'm sure only with three of them), so I'll
describe them from left to right order.
| 1. |
(?) |
|
Not even detected by xev |
| 2. |
(?) |
Same as: Fn+Space |
Works |
| 3. |
Touchpad on/off |
Same as: Fn+F9 |
Works |
| 4. |
(?) |
|
Not even detected by xev |
| 5. |
Internet browser |
Same as: Fn+F4 |
Works |
| 6. |
Power on/off |
|
Works |
Solved problem: Some special keys do nothing when I press them.
Follow this article to assign your own actions to these keys, but use /usr/share/X11/XKeysymDB file instead of (non-existing in my case) /usr/share/X11/XKeySymDB.
This approach uses xev, xmodmap and kcontrol.
Linux identification (outputs)
lspci,
lshw,
lsusb
Kubuntu and kernel version
Kubuntu Feisty (7.04) - 32b (i386) desktop version.
2.6.20-16-generic #2 SMP (original distribution kernel)
Pre-installation
BIOS update
Warning: There MAY be (I'm not sure whether this problem was also with the original BIOS) problems with higher BIOS versions than F3TcAS216, so BIOS flashing will result into
"invalid" MAC address of the ethernet adapter. It seems that after flashing BIOS the ethernet adapter MAC address
is changed to 66:77:44:22:33:11 instead of the real and original one. Well, you probably won't notice any
difficulties, there can be problems only if two same MAC addresses appear on the same subnet.
See the "solution" ("workaround" is a better term) of this problem that I found and that's working for me.
I've read that there are problems with older BIOS versions (processor overheating, bluetooth and wifi problems etc.) on this laptop,
so I decided to update the current BIOS.
Latest BIOS can be downloaded from the Asus ftp server (F3TcAS218.zip in my case).
Since the "easy flash" utility in BIOS does not work with anything but FDD, there are two possible ways how to update it:
- Install WinXP and use the Asus BIOS flash utility for Windows (untested)
- Create a DOS USB drive, boot from it and use the Asus BIOS flash utility for DOS - I'll use this one (see this howto if you have any problems with creating a DOS USB disk)
warning: this is for advance users only - it may cause you troubles if you don't know what you're doing - no warranties
- download Asus BIOS DOS flashing utility for F3T laptops
- get some USB flash disk and plug it in (you'll need a working system to do that, maybe it should work using the live CD, but I haven't test it)
- get device identification (fdisk -l), in my case it is /dev/sde, your's can be different
- create DOS file system (FAT) on it (mkdosfs -I /dev/sde) - warning: all your data on it will be lost!
- create boot sector on it using this perl script
- download FreeDOS image (it's a floppy disk image, but it doesn't matter)
- mount it (mkdir freedos-image && sudo mount ./fdos1440.img freedos-image/ -o ro,loop=/dev/loop0) and copy all files from there to your flash disk
- copy AFLASH2.exe and F3Tc.218 (these files are in F3TcAS218.zip and AFLASH2_DOS_060731.zip) to your flash disk
- unmount your flash disk and plug it into the laptop
- you should now be able to boot from it (set it as the first boot device in BIOS) and run the AFLASH2.exe utility from it
- proceed according to these documents to do the flashing
- after it's done, create a FAT file system on your flash drive (mkfs.vfat /dev/sde) - this will put it into the "previous" state - warning: all your data on it will be lost!
Solved problem: Invalid eth0 MAC address after BIOS update.
I tried flashing BIOS from version 218 to versions 217 and (unofficial) 219, but the eth0 MAC address remained unchanged. So, here is the workaround I found (until a new BIOS which fixes this issue is released):
Install macchanger (it allows you to fake the ethernet adapter MAC address):
sudo apt-get install macchanger
Get my eth0 MAC address changing init script (feel free to change the MAC address in the script):
	cd /etc/init.d
	sudo wget http://publications.petrzemek.net/articles/Asus-F3Tc-AP049-Kubuntu-Feisty-7.04/files/change-eth0-mac-address
	sudo chmod a+x ./change-eth0-mac-address
Make this init script to be run at the boottime (change the "09" number if you already have some script associated with this number, but note that it must be run before the networking service is run).
sudo update-rc.d change-eth0-mac-address start 09 S .
Change the eth0 MAC address in the /etc/fstab file according to the one in the previous init script. That's all.
Disk partitioning
I used QtParted to do the partitioning (after booting into the live CD):
- ~20 GB - Windows (ntfs)
- ~2.1 GB - swap (swap)
- ~20 GB - / (ext3)
- ~68 GB - /home (ext3)
I need Windows only because of some mandatory courses on our faculty - there is software which I can't run on GNU/Linux :(.
So if you're luckier than me, you can use the space more usefuly.
Installation
I used kubuntu-7.04-desktop-i386.iso (32b) version. There were no problems during
the installation at all and everything went ok.
Post-installation
Enable all repositories you need (you will surely need to enable restricted repository to get the proprietary nVidia drivers) and do:
	sudo apt-get update
	sudo apt-get upgrade
Now reboot to the latest kernel (2.6.20-16-generic in my case).
Most things should be working now, so lets elaborate on these which needs
additional care to get (fully/better) working.
VGA (configuration, external monitor)
You have two options - you can either use the free nv driver or the proprietary one.
Since I wanted 3D acceleration, I chose the proprietary drivers. It also seemed to me that
the screen quality is better with the proprietary drivers (but that's only subjective).
To install the nVidia proprietary drivers, the restricted repository must be enabled.
	sudo apt-get install linux-restricted-modules-generic nvidia-kernel-common
	sudo apt-get install nvidia-glx-new # I had problems with the non-"new" version
	sudo nvidia-glx-config enable # If this doesn't work, change the driver manually
	sudo nvidia-xconfig
	sudo shutdown -r now # Reboot
You should be now able to change the screen resolution and other things simply using the nvidia-settings utility.
Solved problem: nvidia-settings can't write to the X configuration file
Changing things that are saved to the local configuration file (~/.nvidia-settings-rc) works, but everytime I try to save settings
to the X configuration file, I get these errors (sudo nvidia-settings):
	ERROR: Unable to determine valid vertical refresh ranges for display device 'CMO' (GPU: GeForce Go 7300)!
	ERROR: Failed to add display device 'CMO' to screen 0!
	ERROR: Failed to add X screen 0 to X config.
	ERROR: Failed to add X screens to X config.
	ERROR: Failed to generate an X config file!
I solved it by uninstalling the nvidia-glx driver (don't forget to change the driver from "nvidia" to "nv" in the X configuration file before restart, otherwise X won't start):
	sudo apt-get remove --purge nvidia-glx linux-restricted-modules-generic nvidia-kernel-common
	sudo shutdown -r now # Reboot
and installing the nvidia-glx-new driver.
The installation procedure of the nvidia-glx-new driver is described at the beginning of this section.
Solved problem: Mouse cursor is flickering when running an OpenGL application
Add this option to the Screen section in the X configuration file:
Option "HWcursor" "True"
Solved problem: Screen refresh (redraw) rate seems slow to me
Change color depth from 24 to 16 bpp (either using the nvidia-settings utlity - recommended, or directly in the X configuration file).
Note that you most probably won't be able to run compiz/beryl after then.
X configuration file
You can download my xorg.conf and try to replace appropriate sections if you are experiencing some problems.
- xorg.conf (nvidia driver, 3D acceleration enabled, single screen: 1280x800@60Hz, touchpad and mouse is working)
External monitor
The best way how to configure an external monitor is using the nvidia-settings utility - it found my second monitor
and I was able to configure everything - however, I only tested TwinView with an external Acer LCD panel (1280x1024@60Hz).
Audio
There are no problems with sound in general - I'm using kmix as alsamixer GUI frontend.
Solved problem: Microphone is not working
This was a rummy problem at first, but after some searching I found a working solution. Add these lines to the /etc/rc.local file before exit 0:
	# This makes the microphone working...
	/usr/bin/amixer set "Input Source" Line
	/usr/bin/amixer set "Input Source" Mic
However, don't ask me why these lines make the microphone working - they just do and I'm happy.
You can try it yourself by running:
arecord -D plughw:0,0 -f S16_LE - | aplay -D plughw:0,0 -f S16_LE -
Now say something to the microphone and you should hear it with a short delay.
Solved problem: KMix doesn't mute/unmute and change volume properly
Right click on Kmix, "select master channel" and choose different channel ("front" in my case).
Wifi
For best usage I recommend you to install madwifi-tools (CLI) and knetworkmanager (GUI) utility (the latter one seems to be installed by default).
sudo apt-get install madwifi-tools knetworkmanager
Solved problem: Wifi keeps disconnecting regularly (mostly when there is low signal strength)
Some details why this is happening are here.
So, either add "/sbin/iwpriv ath0 bgscan 0" to "/etc/rc.local" (before the "exit 0" line!) or
if you're using [k]networkmanager, create /etc/NetworkManager/dispatcher.d/30setpriv with this content:
	#/bin/sh
	# Disables wifi background scanning (causes frequent reconnects)
	/sbin/iwpriv ath0 bgscan 0
After the file is created, make it executable:
sudo chmod a+x /etc/NetworkManager/dispatcher.d/30setpriv
Touchpad
Touchpad is working out of the box, but I recommend you to install ksynaptics utility.
sudo apt-get install ksynaptics
Using this utility you can configure touchpad sensitivity, disable touchpad while typing, enable tapping and scrolling and many other things.
Before you can use it you have to add
Option "SHMConfig" "on"
to the touchpad InputDevice section in the X configuration file.
Solved problem: Cursor continues moving even when I don't move with my finger
Disable "Cursor movement" in the "Scrolling" section.
Solved problem: Sensitivity is still too low, even if I set it to highest
Add these options to the touchpad InputDevice section in the X configuration file:
	Option         "MinSpeed" "0.8"
	Option         "MaxSpeed" "1.0"
	Option         "AccelFactor" "0.1"
You can of course change these values according to your needs.
Webcam
There are open-source drivers for Syntek cameras -
they're available (after compilation) as kernel modules. So, first get the latest version from the project svn repository
(you need to have subversion installed):
svn co https://syntekdriver.svn.sourceforge.net/svnroot/syntekdriver syntekdriver
Compile the drivers:
	cd ./syntekdriver/trunk/driver/
	make
Load them (the camera should blink/flash):
	modprobe videodev
	insmod stk11xx.ko fps=25 hflip=0 vflip=0
Install camorama and try the camera:
	sudo apt-get install camorama
	camorama -D --width=640 --height=480
The camera should be working now. However, it needs some color tweaking
because the original video image is, well, strange ;).
Using mplayer, the video image (color) quality is much better:
	sudo apt-get install mplayer
	mplayer tv:// -tv driver=v4l2:width=640:height=480:fps=25:outfmt=rgb24:device=/dev/video0
Example screenshots (white wall, green plant and light brown furniture):
Solved problem: The video image is upside-down
When inserting the stk11xx.ko module, change the vflip parameter to 1 (or 0, if it was 1).
insmod stk11xx.ko fps=25 hflip=0 vflip=1
Unsolved problem: The video image is blinking in Kopete
No idea how to solve this, yet - the drivers are still in development.
Unsolved problem: How to get the integrated microphone working
No idea, I haven't tried yet.
Power management
Power management works out of the box (kde-guidance-powermanager is installed by default).
However, I recommend you to install kpowersave instead (it has more configuration options):
	sudo apt-get install kpowersave
	sudo apt-get remove kde-guidance-powermanager
With kpowersave you can create power schemes (screen saver settings,
brightness, autosuspend, CPU frequency policies, ...) and change general settings like
what to do if battery reaches specific level (like 10%) or configure button events.
I haven't noticed any problems (except suspend and hibernation issues) so far.
When I unplug the AC power cable, "powersave" policy gets enabled. When I plug it back, "performance" policy gets enabled instead.
Battery state monitor seems to be working, too.
Suspend and hibernation
Because I don't use these features and I've read that there are many problems getting suspend to work properly,
I just tried it to see whether at least something will work, but I won't spend much time on these (well, at least not until Gutsy (and new kernel version) is out).
Unsolved problem: Suspend and hibernation doesn't work properly
I've tried standard ACPI suspend (echo [mem|disk] > /sys/power/state), hibernate scripts and uswsusp as well,
but I either got only black screen after recovery or one CPU core gets deactivated.
So, lets wait until Gutsy is out...
Frequency scaling
Frequency scaling works out of the box (powernowd is installed by default). Again, I'm using kpowersave and cpufreq-utils
to manage frequency scaling.
cpufreq-info output (only one core info, the second one is similar):
	analyzing CPU 0:
	driver: powernow-k8
	CPUs which need to switch frequency at the same time: 0 1
	hardware limits: 800 MHz - 1.80 GHz
	available frequency steps: 1.80 GHz, 1.60 GHz, 800 MHz
	available cpufreq governors: ondemand, conservative, powersave, userspace, performance
	current policy: frequency should be within 800 MHz and 1.80 GHz.
					The governor "performance" may decide which speed to use
					within this range.
	current CPU frequency is 1.80 GHz.
Thermal control
Processor
Follow this howto to get the lm-sensors working.
I didn't have any problems with the configuration. Here are appropriate modules which I put into /etc/modules:
	# lm-sensors
	lm90
	k8temp
	i2c-nforce2
sensors output:
	k8temp-pci-00c3
	Adapter: PCI adapter
	Core0 Temp:
				+37°C
	Core1 Temp:
				+34°C
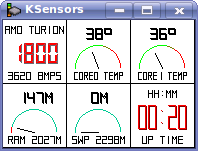
You can then install ksensors as a lm-sensors GUI frontend. Here is a screenshot.
Hard disk
Install hddtemp and run sudo hddtemp /dev/sda - my output:
/dev/sda: Hitachi HTS541612J9SA00: 37°C
Conclusion
I must say that I was surprised how many things just worked out of the box!
Everything I need is working now, even the integrated webcam with open-source drivers (well, I actually don't need it, but it's great that it's working).
So, if you are looking for GNU/Linux compatible laptop, I'd definitely recommend this one to you!
Here is a short (but complete) list of things that doesn't work for me at the moment:
Feel free to post me your remarks, questions, ideas or hints that you may have at s3rvac@gmail.com.
Links
Changelog
